> For the complete documentation index, see [llms.txt](https://docs.getgymini.com/gymini/llms.txt). Markdown versions of documentation pages are available by appending `.md` to page URLs; this page is available as [Markdown](https://docs.getgymini.com/gymini/features/features-overview/calendar/how-to-configure-staff-member-selection-in-round-robin-calendars.md).
# How to configure Staff Member selection in Round Robin Calendars?
### Introduction
Our booking widget includes a popular feature: Staff Member Selection. This function lets your clients select their preferred staff member when making appointments, offering a personalized touch to their booking experience.
### **What is the Staff Member Selection feature in Round Robin Calendars?**
The "Staff Member Selection" feature significantly enhances your booking system, specifically designed to increase the flexibility and personalization of your service offerings.
Primarily, it operates within the framework of the Round Robin calendar system in conjunction with the Neo widget type. When this feature is enabled, a dropdown menu appears on the booking widget, which lists all the team members who are part of that particular Round Robin calendar
This opens up a new layer of choice for the end users, the appointees. They can now select a specific staff member while scheduling an appointment, thus allowing them to choose who they wish to interact with during their appointment.
This feature has been carefully designed to accommodate scenarios where a selected staff member may be unavailable. In such instances, a message will be displayed to the user indicating the unavailability and suggesting the next available slots.
Moreover, it fully supports the rescheduling of appointments. During this process, the user is shown the staff selection again, allowing them to either stick with their original choice or opt for a different staff member.
#### **What are some practical usage cases for this feature?**
Fitness clients often prefer working with a specific trainer who understands their needs, goals, and fitness level. This feature allows members to book sessions with their preferred personal trainer, fostering a stronger client-trainer relationship and improving client retention.
#### **What are some notable benefits of this feature?**
Here are some practical benefits of the "Staff Member Selection" feature:
**Increased Customer Satisfaction:** By allowing clients to choose their preferred staff member, you're providing a more personalized and comfortable experience, which can lead to higher customer satisfaction.
**Improved Efficiency:** This feature can streamline the booking process, as clients can directly select their preferred staff member instead of making additional requests or changes after the initial booking.
**Enhanced Staff Utilization:** Giving visibility into the staff members available for service can lead to better utilization of all staff members and potentially uncover hidden talent within your team.
**Better Customer Retention:** Customers are more likely to return if they had a positive experience with a particular staff member. This feature makes it easy for customers to rebook with their preferred staff member, improving customer loyalty and retention.
**More Accurate Data Collection:** By tracking which staff members are most selected, you can gain valuable insights into customer preferences and staff performance, which can inform business decisions and strategies.
**Greater Flexibility in Rescheduling:** The feature makes rescheduling more flexible. Clients can choose the same staff member or a different one, depending on their preference and the staff member's availability.
**Improved Business Reputation:** Offering such a feature can position your business as customer-centric and responsive to customer needs, enhancing your reputation in the market.
**Increased Revenue:** This feature can potentially increase your business's bookings and revenue by improving customer satisfaction and retention and enhancing staff utilization.
#### **How to use the Staff Member Selection feature in Round Robin Calendars?**
**Please Note:**
{% code overflow="wrap" %}
```
Only those staff members will be visible in the booking widget whom you add to the Calendar.
```
{% endcode %}
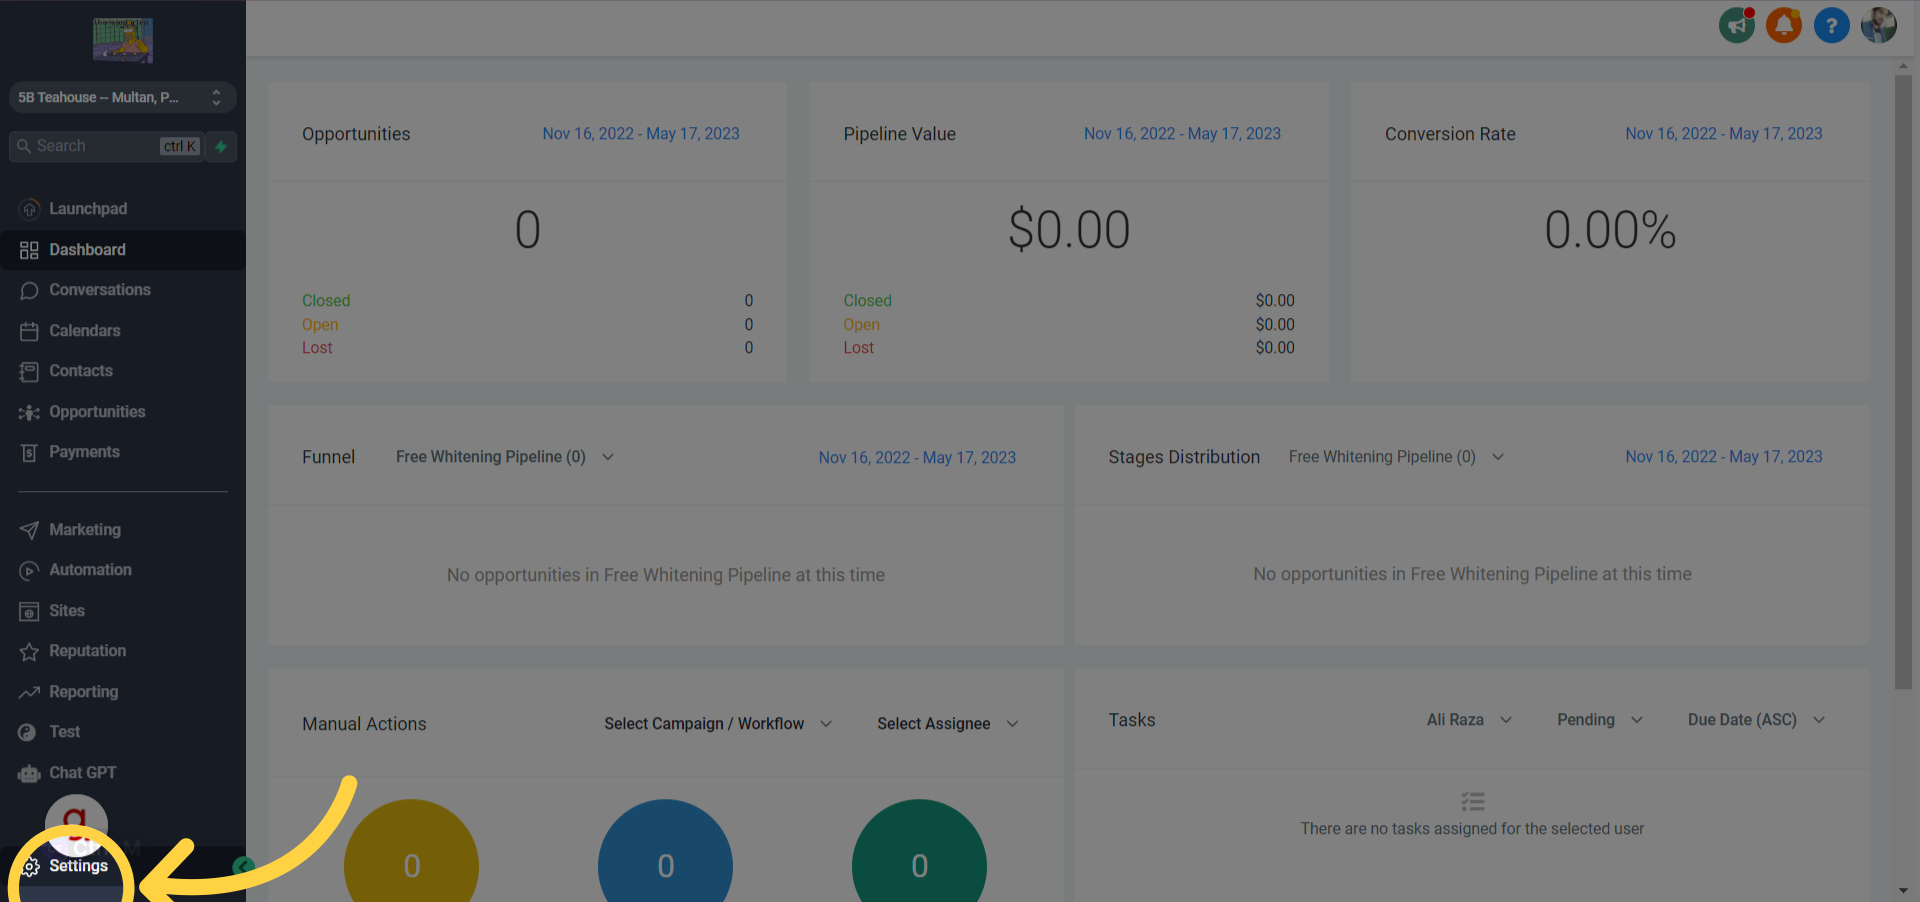
**Step 1:** Click "Settings"
Access the settings option in your sub-account.
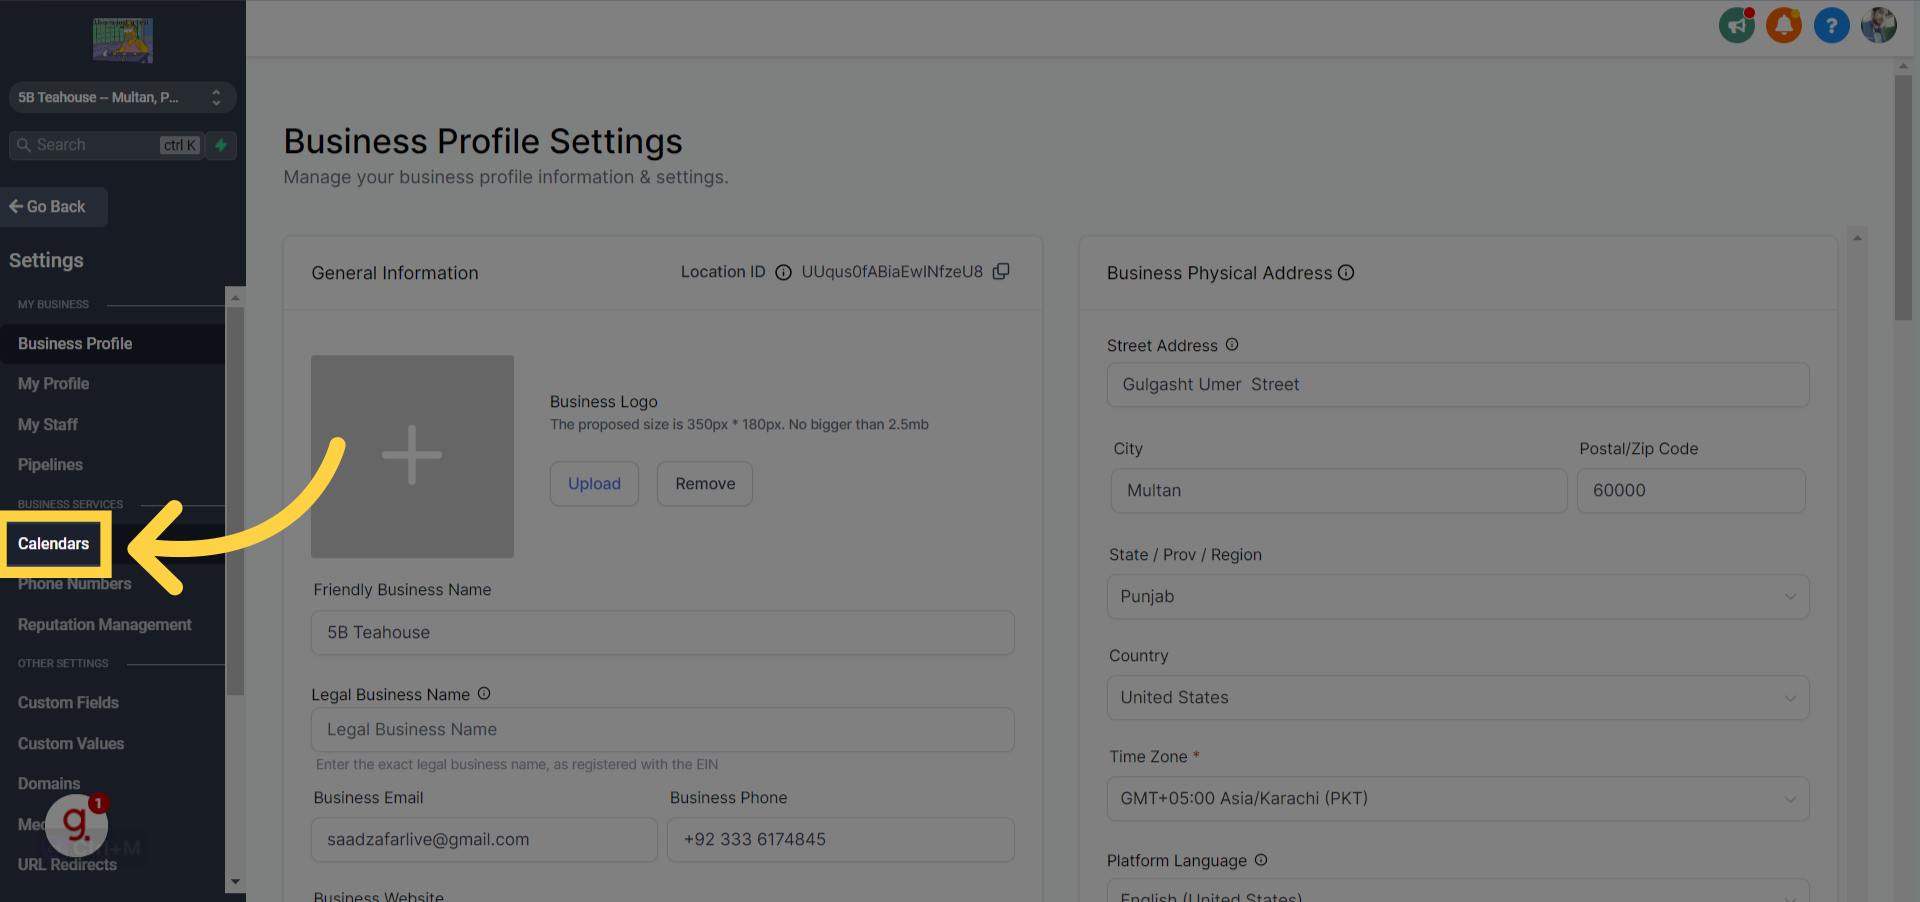
**Step 2:** Click "Calendars"
Go to the Calendars option in Settings.
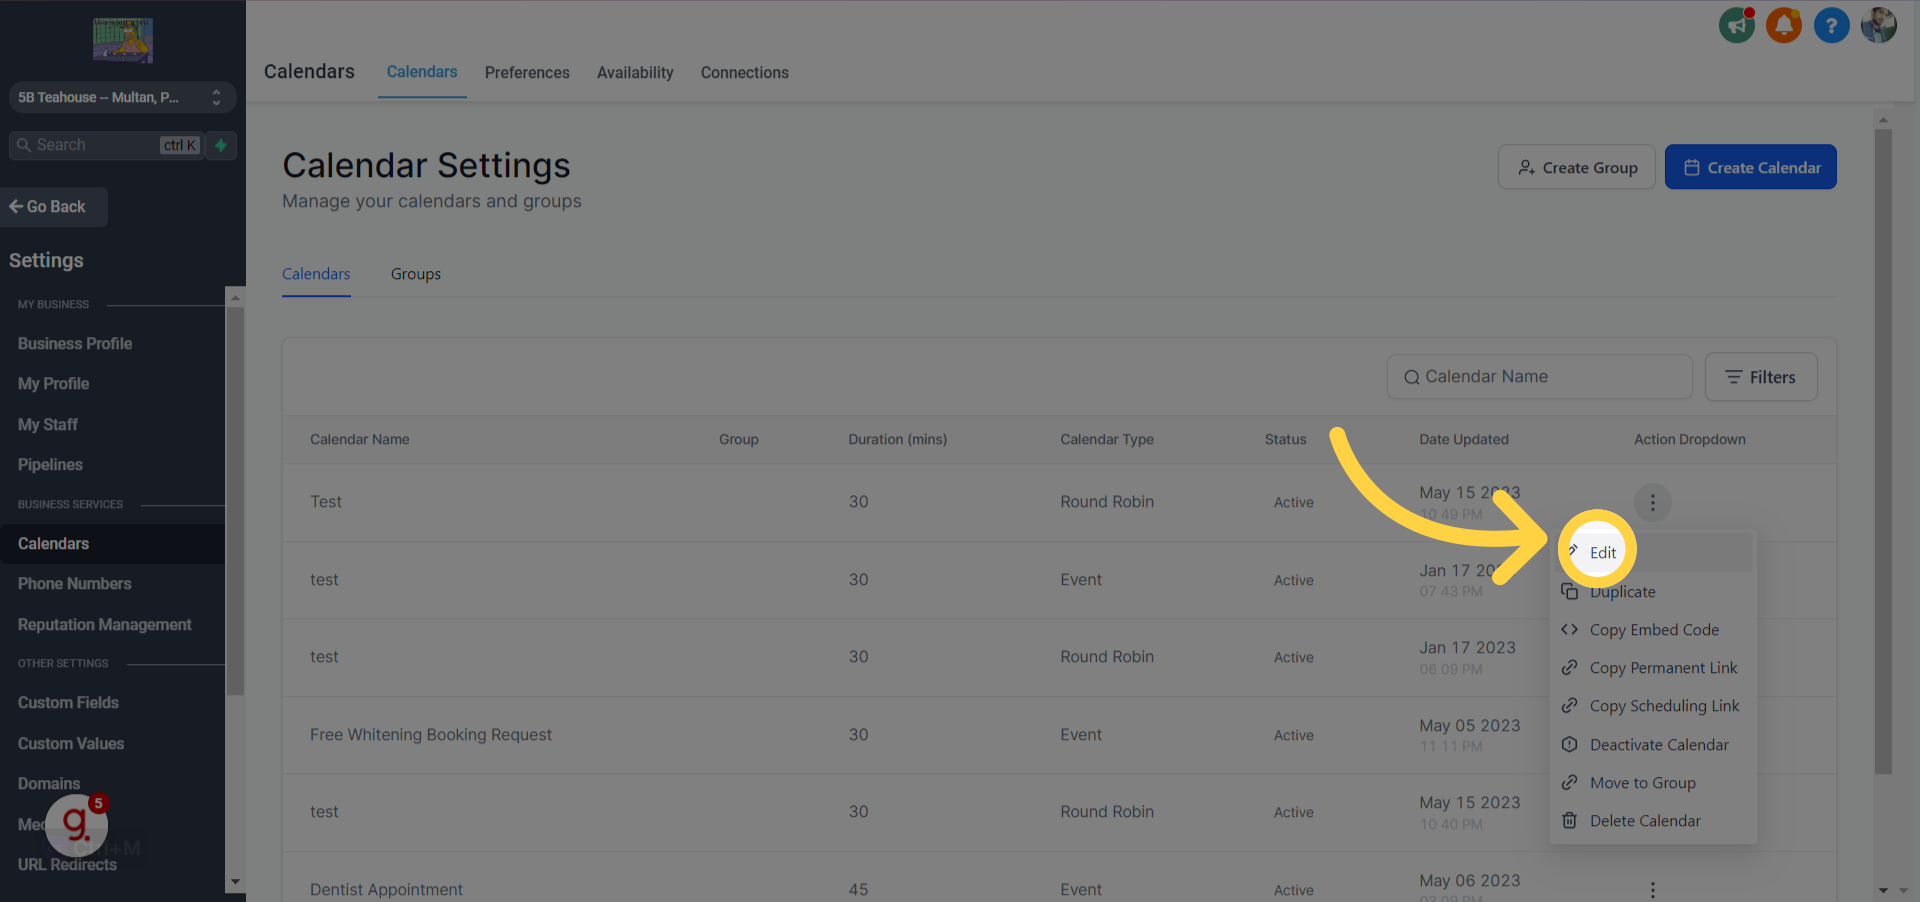
**Step 3:** Click here
Click on the 3 dots for the desired calendar.
**Please Note:**
{% code overflow="wrap" %}
```
If you are creating a new Calendar, Please Make sure to choose the Round Robin Booking Type. Add all the users whom you need to be made available for that calendar.
```
{% endcode %}
**Step 4:** Click "Edit"
Click on the Edit option.
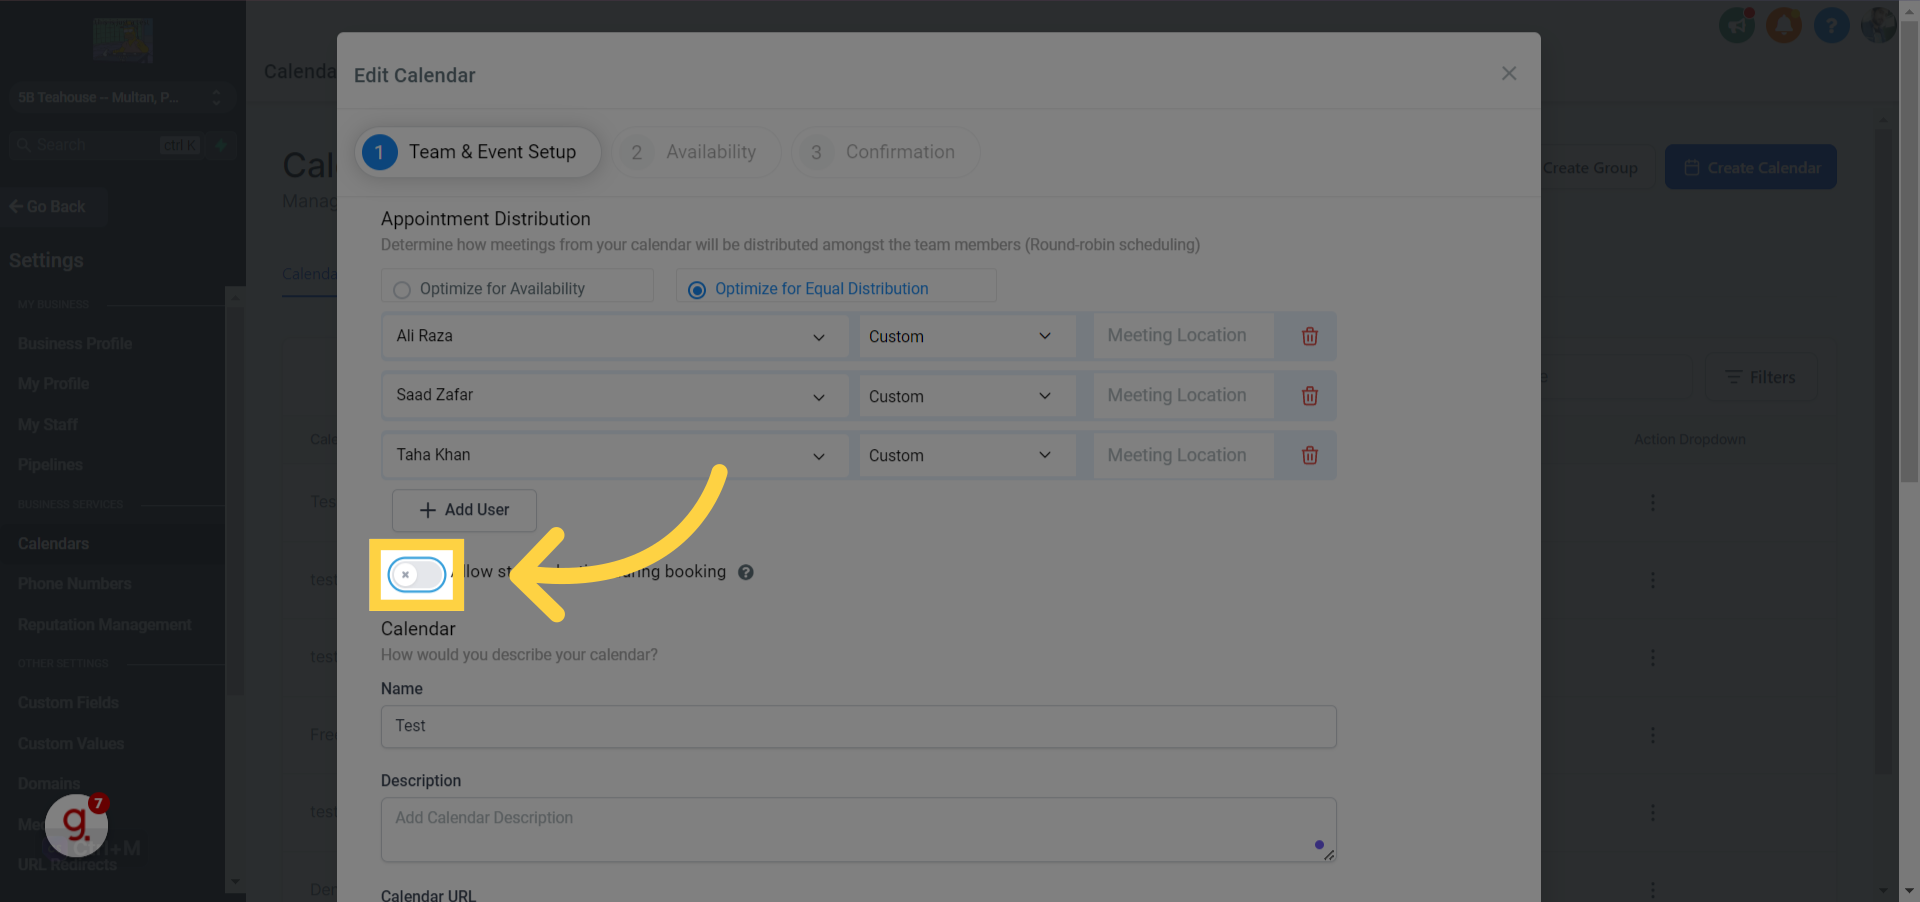
**Step 5:** In the Team and Event Settings Tab, Toggle this on
Toggle on the "Allow staff selection during booking" option.
**Step 6:** Make sure that the widget type is set to NEO
Select the Neo option in Widget Type. The Classic Option is not compatible with this feature at the moment.
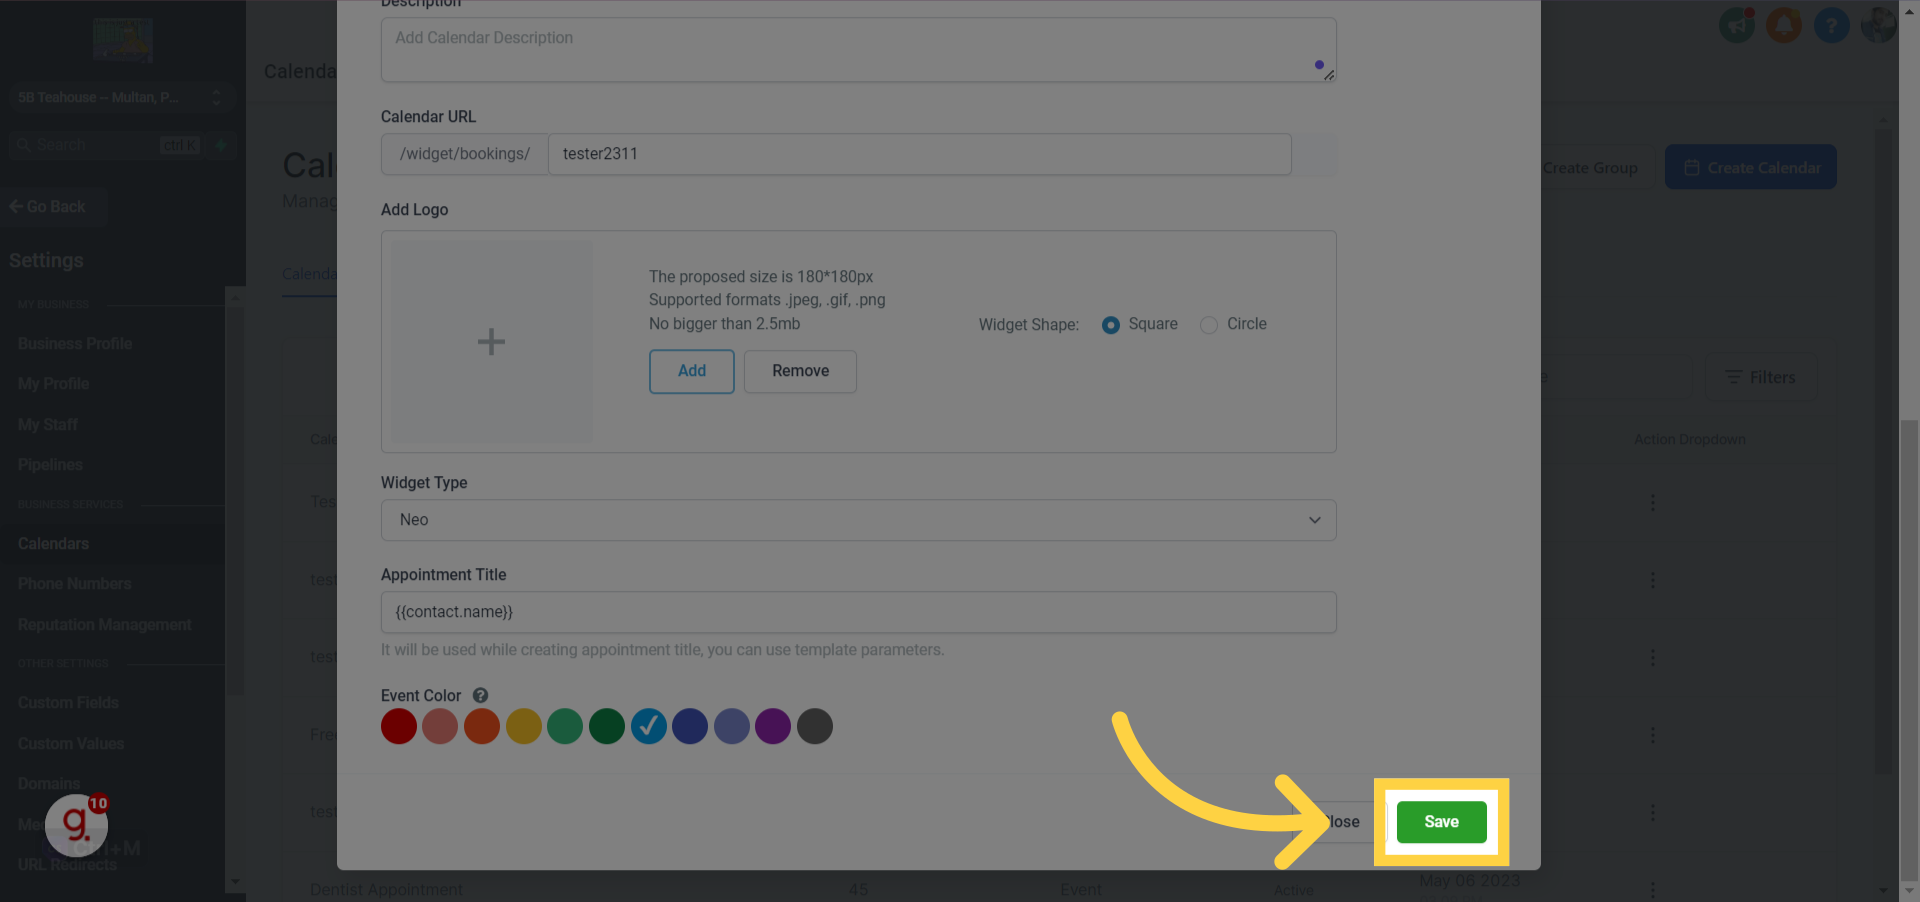
**Step 7:** Click "Save"
Save the changes.
**Step 8:** Click "Close" if other Calendar settings are set per your needs.
Close the window.
**Step 9:** Click here
Click on the desired calendar.
**Step 10:** Click "Copy Scheduling Link"
Click on the Copy Scheduling Link option.
**Step 11:** Open up the Booking widget using the scheduling link. You will see a dropdown to choose a user.
Users will be displayed here based on whom you added and set as available in that particular calendar.
**Step 12:** Click any user with who you want the appointment to be booked with
Select the employee's name from the list.
#### **How does Rescheduling work with this feature?**
Here's how the "Staff Member Selection" feature works when rescheduling appointments in three scenarios.
**Rescheduling from the Contact's Appointments Tab Internally:**
* Go to the contact's appointments tab.
* Find the appointment that must be rescheduled and click the "Edit" button.
* You'll see an option to select a different team member for the appointment. Click on the dropdown menu and choose the new staff member you want to assign the appointment to.
* Once you've selected the new staff member, save the changes. The appointment will now be reassigned to the chosen staff member.
**Rescheduling from the Appointments Tab in the Calendars Menu:**
* Navigate to the Calendars Menu in the Sidebar and click the Appointments tab.
* Find the appointment that needs rescheduling and click on it to edit.
* Like the previous method, you can select a different team member for the appointment. Use the dropdown menu to select the new staff member.
* After selecting the new staff member, make sure to save the changes. The appointment will be reassigned to the chosen staff member.
**Client Rescheduling on Their End:**
Your client will receive a reschedule link when they book an appointment.
* If they need to reschedule, they can click on this link. This will take them to the booking widget, where they'll see the option to select a different staff member for their appointment.
* They can then choose a new staff member from the dropdown menu and select a new date and time as per the chosen staff member's availability.
After making these selections, they can confirm the rescheduling. The appointment will now be rescheduled with the new staff member.